Archive | Recycled Crafts RSS feed for this section

Hanging Vases

2 Sep

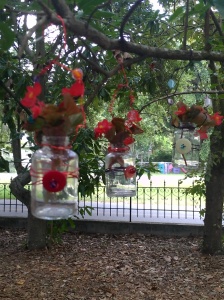
IMG_20130902_142521Usually, we make up our own crafts, but we got this idea from Pretty Handy Girl.

It is a fun craft and these will make great presents. You can get the directions HERE.

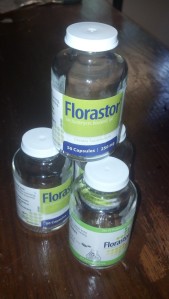
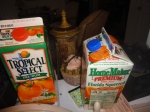
We decided to make these because we had a lot of bottles like this:

IMG_20130902_142818_861

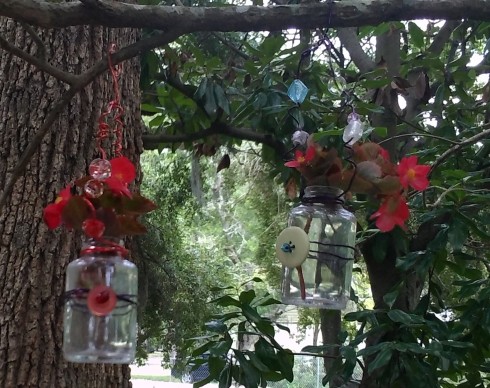
The bottles were cute so we wanted to use them. One thing we did differently was that we used colored wire, and glass beads.

IMG_20130902_142447

*The worst thing about this craft was removing the labels from the bottles. We finally used cooking oil to loosen the glue, then washed with hot water and cleaned with Windex.

Spray-Paint Face Lift

14 May

Spray paint is a fun way to make old things look new! Here is a ceramic swan we bought for twenty five cents at a thrift shop.

hillcrest 315

I added a coat of spray paint, a gemstone eye, and a touch of nail polish for the bill. Now it looks perfect in my bathroom. And it’s a great place to store cotton balls.

SCBWI NE 2013 040


Once we got started, we found other objects to transform with spray paint too. We’ll post some of those later!

Materials Needed:

0ld objects

spray paint

nail polish

gemstones


Directions:

1. Clean object before painting. Allow to dry.

2. Add coat of spray paint following directions on can.

3. When paint is dry, add details. I used nail polish to paint the bill, and I glued a plastic gemstone on for the eye.

This is a fast and easy craft. An adult should help with spray painting. We used the back of my old science project board to  protect other surfaces from paint. This worked great!


Cards from Covers

14 Feb

IMG_20130213_155055


It is hard for us to throw away old books, but sometimes they just aren’t useful anymore. 😦 When books have canvas-like covers, we’ve started saving the covers for other projects before throwing the rest of the book away. Here is a Valentine’s Day card we made from a book cover this year.

This was super-easy to make. All you need is hot glue and cool stuff to glue to the cover. Notice we cut some hearts out of book pages to go with the theme. Here is another cover we made into a get well card. We love the way the texture on this book cover looked!

IMG_20130213_155223


This is a craft we plan to do again, so expect to see more examples of book cover cards here soon! So far, everyone we’ve sent a book cover card to has loved them. Your friends and family will too!


To see this Valentine’s Day craft we posted last year click HERE.

Organize Your Duct Tape!

3 Jan

IMG_20130103_181015We’ve done duct tape crafts here before and we wanted to share this perfect way we found to organize duct tape! We were about to throw out this old paper towel holder when we realized we had a great use for it. All we did was put the duct tape over the rods. Now it is ready to use!

Supplies:

Old Paper Towel Holder

Rolls of Duct Tape

That’s it!

To see some of the things we have made using duct tape click on these links:

Duct Tape Belt

Duct Tape Purse

Duct Tape Wallet

Easy School Presentation Board

5 Nov

I had to do a school presentation about myself earlier this year. Part of my grade was on how attractive my display was. We didn’t have any poster board that would work, so we got the idea to cover a piece of cardboard with an old t-shirt. We just cut the cardboard to the right size, slipped the t-shirt over it, and pinned back the sleeves with duct tape. Then I glued the items I needed to display right on the t-shirt with hot glue.

It worked so well, I will probably use the idea again!

Another idea we had was to use short Popsicle sticks to label the items. I wrote on them with a thin Sharpie.  This also worked great!

Materials:

Piece of Cardboard

Old T-Shirt

Duct Tape

Directions are above!

Tea Box Totes

1 Sep

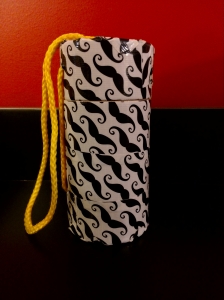
My mom drinks primula tea and it comes in these cute little cardboard boxes, so we decided to decorate them to turn them into cute little totes. These are the perfect size to carry a cell phone or ipod along with chap stick, pens, and more.

Materials Needed:

1. Primula tea canister

2. Duct Tape

3. Scissors

Directions: 

1. Carefully remove string from canister. Pay attention to how it goes in and out of the holes.

2. Wrap tape around canister and cut. Repeat until canister is covered.

3. Using scissors, poke holes in tape to match holes in canister.

4. Restring canister.

Other ways to decorate the primula boxes:

The box on the on the left was decorated with sharpies and a felt shape. The box on the right was painted with acrylic paint, then decorated with felt shapes and buttons. Notice that a different type of string can be used when you are ready to restring the box, you can replace the string that comes with the box with ribbons, like my friend A. M. did with the box on the right.

Directions for replacing string with ribbons:

Tie a large knot in one end of the string. Starting inside the canister at one of the bottom holes, begin putting string in, the way you took it out. You should end up with a loose end back on the inside of the box. Tie another knot that is too big to leave the hole. Secure with glue if needed.

These also make great boxes for sharpies and other markers! To see a photo of what the boxes looked like before, or to order primula tea, click HERE!

Pop Can Tab Owls

29 Jun

We made these owl pins from Diet Coke can tabs. 

*This craft requires working with hot glue in small areas, so adult supervision is needed. 

Materials:

1. Tabs from soda cans.

2. Sequins.

3. A feather.

4. Rhinestones.

5. Hot glue.

6. Coated wire for feet. (optional)

7. Felt for bill. (optional)

8. Small Pin Backs. 

9. Wire clippers and round nosed pliers. (optional)

Directions:

1. If you have wire clippers and round nosed pliers, you may want to work on the large hole in the tab to make it rounder/larger. An adult should do this. If you do not have these, it will work to use shape as is. 

2. If you are using wire for feet, wrap coated wire around bottom of hole 3 times for each foot. You can use bits of sequin for feet too. If you choose to do this, glue to front of owl.

3. Take a large round sequin and trim to fit the back of the tab, so the shiny side will show through the large hole.

4. Glue sequin to back of tab with hot glue.

5. Cut a small trip of the fluffy part of a feather. Bend into V shape.

6. Glue V shape to the back of the tab.

7. Glue pin back over tip of feather V and large sequin. 

8. Select two sequins for eyes. Glue in appropriate place.

9. Cut a triangle out of a sequin or felt. glue beneath eyes.

10. Select two small rhinestones for pupils, glue in middle of sequin-eyes. 

You are done! Make a whole flock of them for pennies a piece.

Milk Carton Duct Tape Wallet

18 Jun

It is very unusual for us to do this, but this week we are featuring a craft that can be found on the Family Fun website. It is the Milk Carton Wallet, and it’s usable and functional! We wanted to feature it because our friend Brooklyn made a bunch of them and we loved the way they turned out. Brooklyn is in the fourth grade.  You can visit the Family Fun website HERE to download a template.  We’ve mapped out a few of the steps below so you will know what you are getting into!

First you’ll want to save some juice or milk cartons and wash them thoroughly!


Then you need to download the template, lay it on the carton and cut.

You’ll need to score the sides to create accordion folds, and carefully cut out a hole to fit over the spout.

Now for the fun part! Cover the whole thing with duct tape! Use different patterns for the inside and outside and edges. The inside of your wallet will end up looking something like this:

Look at how cool that is!

The wallet you see here is super sturdy. It is currently being used at summer camp!  Thanks Brooklyn for sharing this cool craft with us!

What to do with old stuffed toys…

20 Feb

When my dog messed up one of my stuffed animal’s heads, I came up with this idea to give it a new one. I think it turned out cute!

 Materials

1. Old stuffed animal.

2. Fuzzy fur fabric.

3. Wiggly eyes.

4. Rubber bands.

5. Hot glue.

I liked the way it turned out so much that I tried it with some other old stuffed animals too.

Directions

1. Cut the head off of an old stuffed animal.

2. Pull stuffing from the head.

3. Ball up stuffing and place in the middle of a piece of Fuzzy fur fabric.

4. Bunch fabric around stuffing and secure with rubber bands.

5. Stick rubber banded end of fabric into neck hole of stuffed animal.

6. Secure with hot glue.

7. Now you have a body with a fuzzy head. Glue on wiggly eyes and tongue if desired.

This one was definitely improved when I added a fuzzy heard.

Your stuffed animal is revitalized!

Tip Junkie handmade projects

Mini Tins

23 Jan

I was getting ready to buy a pill box the other day when I realized it was crazy to pay for something we could make at home.  So here is a new craft with the Altoid box, only this time we used Altoids Smalls tins.

Materials: 

Altoids Smalls boxes Beaded chain Pieces of fabric Metal Scrapbook Letters Gems Strong Glue (We used Crafter’s Pick: The Ultimate)

Directions:

Start with an empty Altoids Smalls tin Cut out a small lid-sized rectangle of fabric Coat top of box with glue Apply fabric Run beaded chain around box and secure with glue Add letters and gems as desired Done in a jiffy! Now it’s ready for trinkets, pills, paperclips, or pins.